
Eastern Sudan is not an area frequently visited by today’s tourist, but in the 1880s and 1890s thousands of British soldiers served there and the graves of many still remain there as the result of several bitter battles between the armies of the British Empire supporting the Khedive of Egypt against the Mahdist forces, which had taken control of Sudan. By 1884, the Egyptian forces in Sudan had been defeated in several battles and their garrisons were besieged by the Mahdists. In east Sudan, an Egyptian force under Valentine Baker Pasha that had landed at Trinkitat to relief the garrison at Tokar, had been routed at El Teb on 4 February 1884. The former British General Charles Gordon, now the Governor-General of Sudan had been sent to evacuate Egyptian forces from Sudan, was now about to be besieged in the capitol Khartoum.
Using Suakin as the base, expeditions were sent out in 1884 and 1885 and several battles were fought in its vicinity: Tamai being one of the fiercest. It was here that the Mahdist army met the British Army for the second time and found men that did not disintegrate and run away in the face of their fierce attacks but stood and fought, but it was also one of the two occasions when a British square was broken by the poorly armed tribesmen. The battlefield today is easily recognisable and it much as it was in 1884. A well-preserved stone obelisk stands on the site and the battlefield graves of the British dead are still clearly visible.
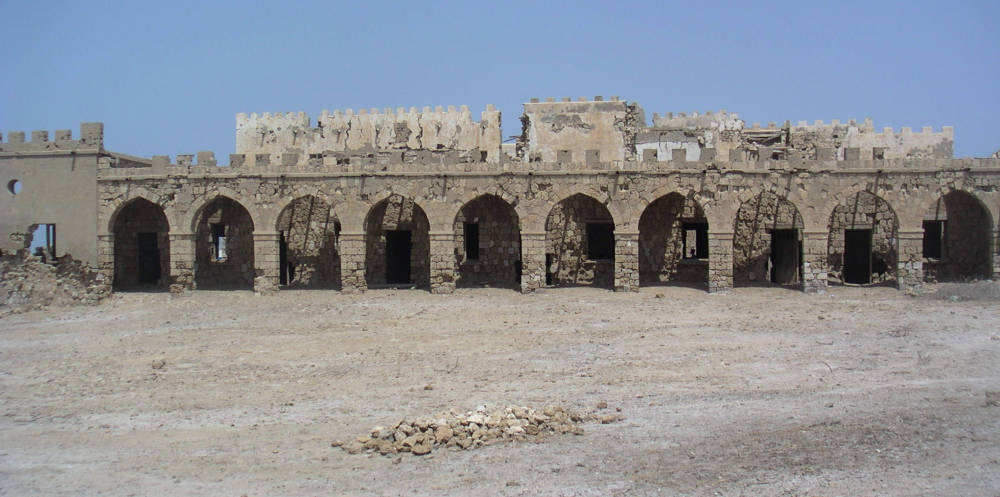
A visit to the area must include Suakin itself. This had been an important Red Sea port for centuries, both in the route from Europe to the East and from East Arica to Saudi Arabia, particularly in the context of the Pilgrimage to Mecca. In the late Nineteenth Century, after the opening of the Suez Canal, it was an important staging post. It was a fine city, built on a circular island, within a large natural harbour linked to the Red Sea by a narrow channel. At that time, it was the most important port on this stretch of the coast, but with the later development of Port Sudan to its north, Suakin fell into decay. In 2005 it was a ghost town, abandoned and its once magnificent coral buildings in ruins.
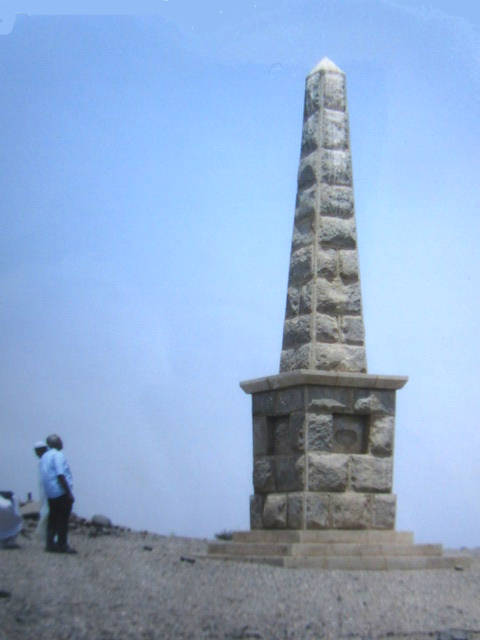
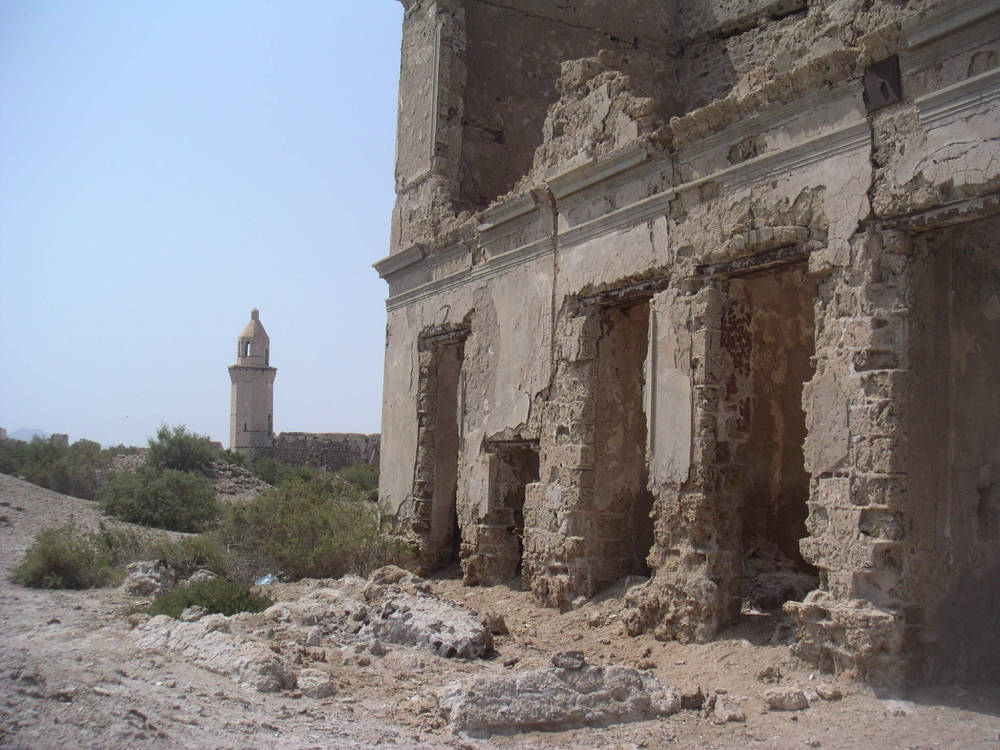
Left: Obelisk at the site of the Battle of Tamai 13 March 1884. Although there were niches that once held inscription plaques; the plaques have been removed, with the result that there is no information available at the site. Click on ../images to enlarge them. Right: Suakin in 2005.
When I visited in 2005, it was abandoned and in ruins, but in December 2017, Turkey signed a 99-year lease to redevelop the Ottoman-era port on Suakin Island as a tourism hub, as a result of a visit by Turkey’s President Recep Tayyip Erdogan to the Sudanese capital Khartoum to strengthen ties between the two countries. In a subsequent meeting with Turkish and Sudanese business people, Erdogan announced that Sudan agreed to temporarily put Suakin island under Turkey's care for reconstruction.
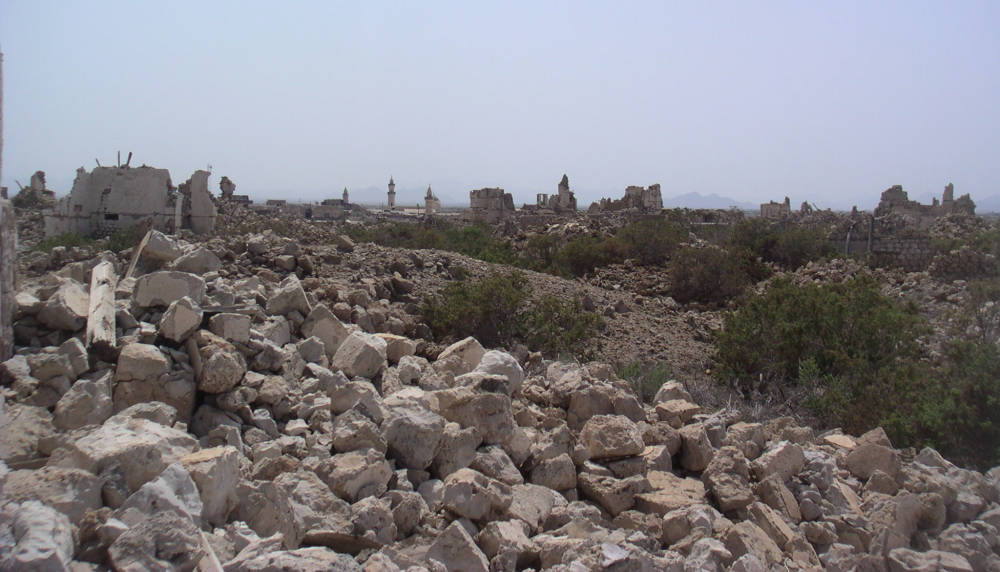
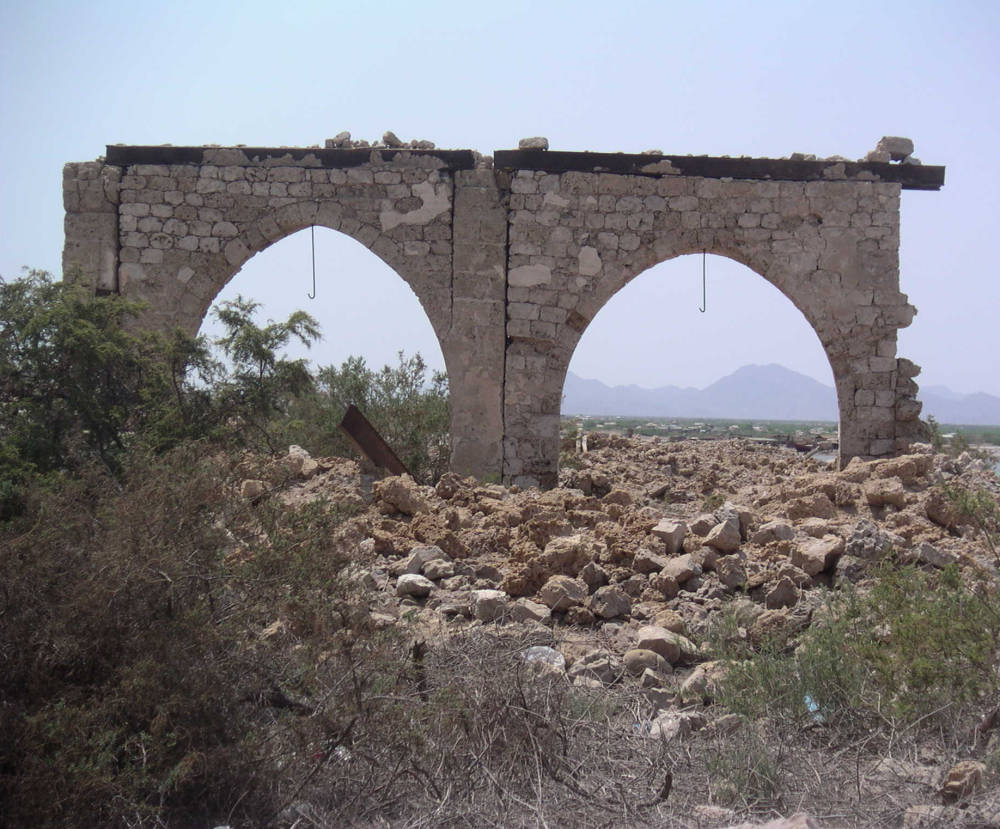
More photographs of Suakin in 2005.
I was fortunate to be in the area as, I was at the time working as the Armed Forces Delegate to the International Committee of the Red Cross (ICRC) Delegation in Sudan and had been tasked to Port Sudan to conduct courses in International Humanitarian Law to some Sudanese Armed Forces establishments there. As a student of military history, I had hoped to visit battlefields of the Anglo-Sudanese campaigns should the opportunity arise. A priority was to visit Tofrek, fought on 22 March 1885, as at one time I had shared an office with a distinguished veteran of the Royal Berkshire Regiment, who had taken great pride in telling me that his Regiment had earned its title ‘Royal’ as a result of this one engagement.
We were working closely with the Sudanese Armed Forces, and permission was given for us to visit Suakin and the nearby area and they also provided guides. Two guides were provided: one was a Hadendowa who knew the area and the other was an interpreter Hadendowa/Arabic; my own colleagues handling interpretation from Arabic to English. We met at Suakin, and after a tour of this fascinating site set off to find ‘Tofrek’. It was evident that our local guide knew the way and set off with confidence. After a relatively short journey across the scrub covered desert, we arrived at a stone obelisk.
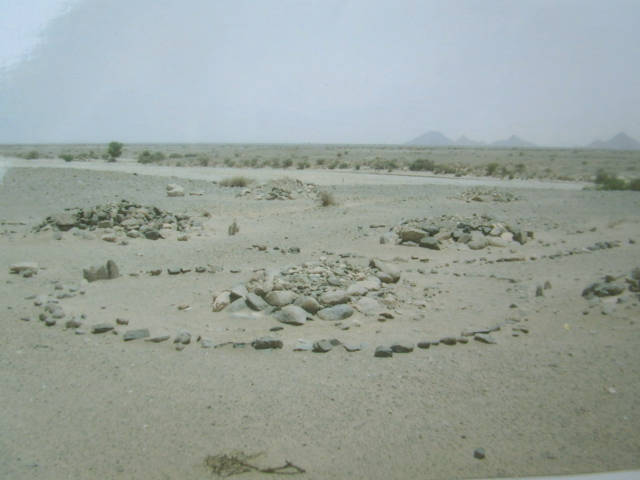
With great excitement, we examined it, but found that all inscriptions had been removed, so no information could be obtained from it. A look around the area discovered many small cairns of heaped earth and stones, which looked like graves. They were not laid out in lines as in a cemetery but were scattered around randomly. I also compared the site with a contemporaneous description I had been given by the Regimental Museum in Salisbury and it quickly dawned on me that this was not Tofrek. Fortunately, I had my reference books with me and soon realized that we were at Tamai, a battle that had taken place a year earlier, during the 1884 Suakin Expedition.
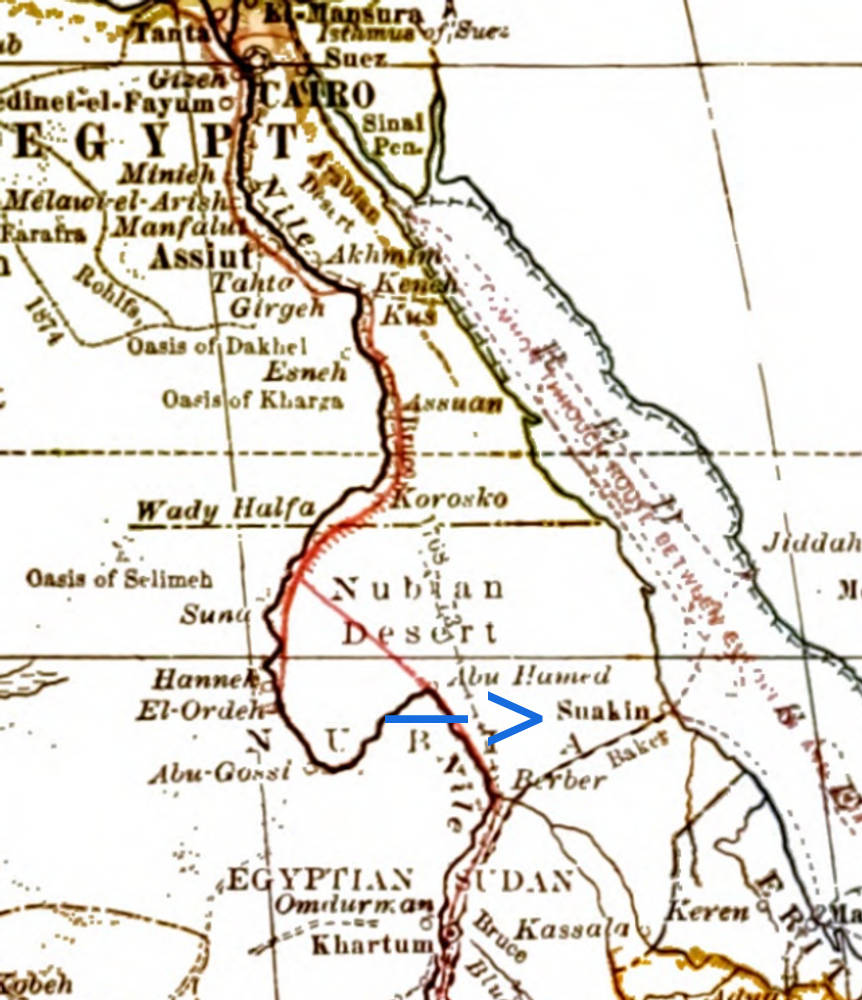
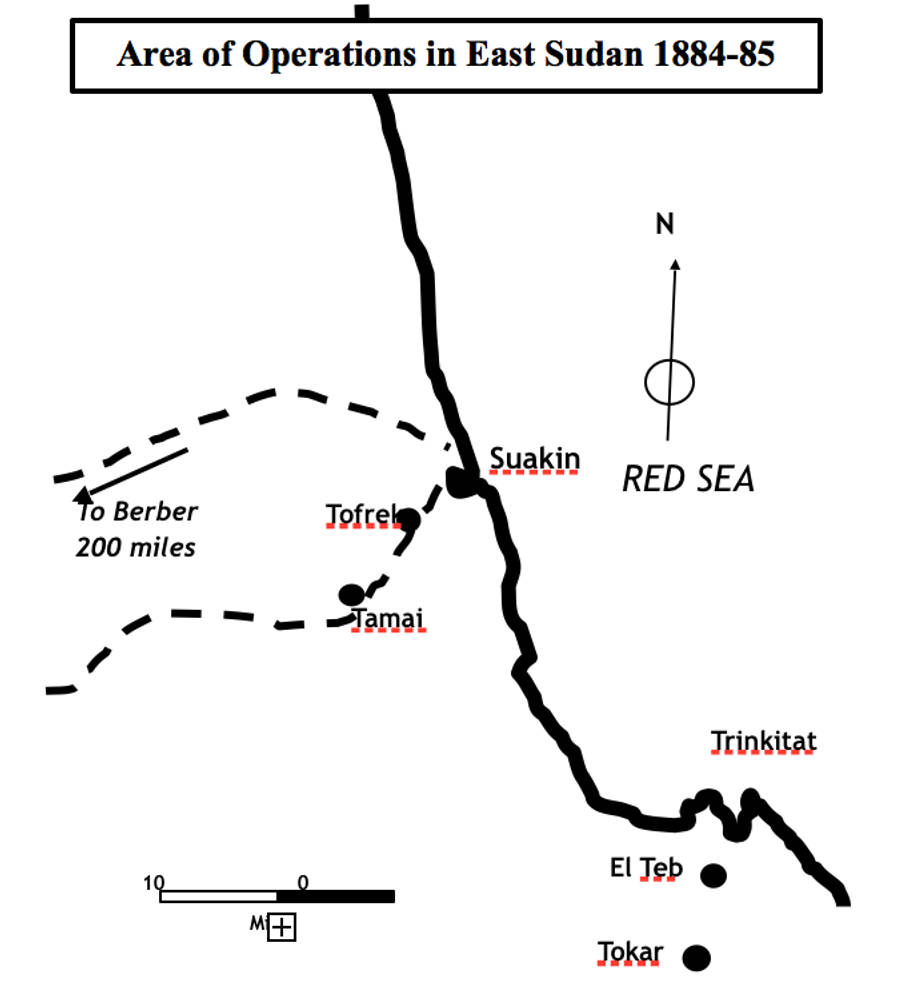
Left: A Map showing the location of Suakin from the 1881 The Encylopædia Britanica. Right: Area of Operations in East Sudan 1884-85.
With Baker’s defeat in February, the position in east Sudan was now critical, the Egyptian garrisons in the area were sorely pressed and Suakin itself was threatened. Great Britain took the decision to intervene and an early aim was to secure the important Red Sea port of Suakin, defeat the Madhists in that part of the country and investigate a possible relief route across the desert to Berber on the Nile. A Royal Navy squadron offshore landed Royal Marines to secure Suakin, but further reinforcements were needed.
Orders for a relief force were issued on 12 February and troops from Egypt, Aden and India began to embark for Sudan. A British force of division strength under the command of Major General Sir Gerald Graham VC KCB landed in the area in late February 1884 and immediately set off to engage the enemy. The Mahdist forces in the area were under the command of Osman Digna, a former slave-dealer, who was an able commander and enjoyed the following of the tribes in the area, which were from the Beja people. Most prominent were the Hadendowa, distinctive because they wore long, elaborately styled hair.
The Mahdist Army’s tactics were based on surprise, speed, and shock; dense assault formations encircled the enemy or attacked from several different directions. They were able to approach at great speed, their foot soldiers often able to keep up with those on horses and camels. The Mahdists possessed relatively few firearms and were mainly armed with swords, spears and clubs. Their aim would be to charge into the enemy, taking advantage of superior strength, initially using their weapons to disarm the defenders then overpowering them in hand-to-hand combat. Captured firearms were used by especially trained personnel, often captured Government soldiers, for sniping and harassing fire.
In his first battle at El Teb on 29 February, on the site of Baker’s defeat a few weeks earlier, Graham gained a decisive victory. After concentrating his force at Suakin, he attempted to negotiate submission and when this was not forthcoming, he set out again to confront Osman Digna at his camp at Tamai, about 12 miles from Suakin. On 10 March, the Black Watch marched out to occupy the first prepared zariba, a campsite protected by a fence of thorns, where it was joined by the remainder of the force the following day. A second zariba, close to the enemy camp, was occupied on the night of 12 March and early the following morning, Graham marched to engage the Mahdist army.
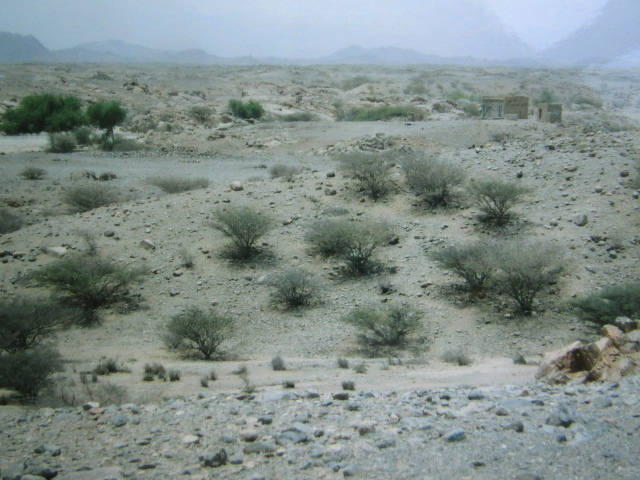
Tamai battlefield. View from where the 2nd Brigade square reached the Khor Ghob ravine, looking towards Tamai village.
Graham marched his force in two brigade squares, screened by cavalry and mounted infantry. The 1st Brigade was commanded by Major General Sir Redvers Buller VC, consisting of 3rd Battalion King’s Royal Rifle Corps, 1st Battalion Gordon Highlanders and 1st Battalion Royal Irish Fusiliers. The 2nd Brigade, commanded by Major General Davis, consisted of 1st Battalion Black Watch, 1st Battalion York and Lancaster Regiment and a battalion of Royal Marine Light Infantry with a Gardiner Gun detachment of the Royal Navy.
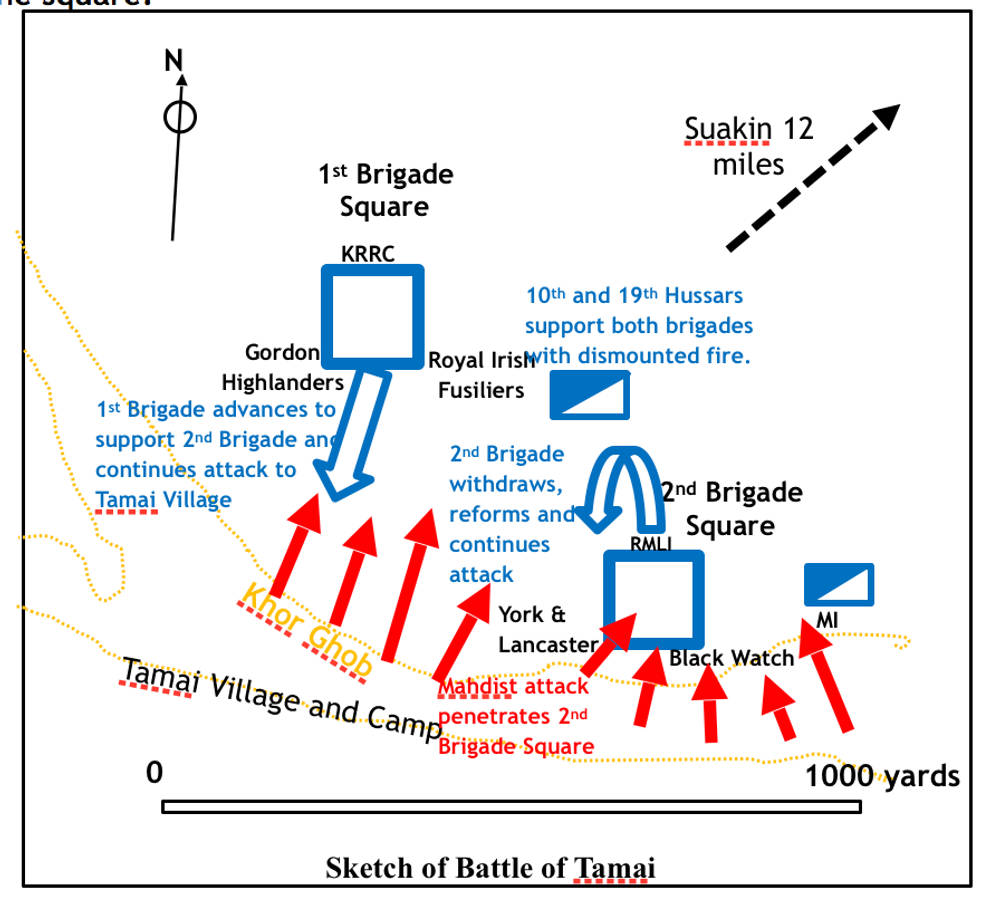
The infantry remained in squares, although this was now an antiquated fighting formation it had again been adopted for this campaign due to the speed and ferocity with which the Mahdist forces could move and close to attack an unprepared enemy. The two squares marched in echelon with the 2nd Brigade forward and the 1st Brigade some 500 yards to its right rear. The 2nd Brigade was formed with the Black Watch forming the left front (three companies) and the left face (four companies) of the square, the York and Lancasters similarly on the right front and right face, with the Royal Marine Light Infantry forming the rear face. General Graham with his staff and the Naval Brigade Gardiner guns were in the centre of the square.
Immediately after the advance commenced, the enemy opened fire from a ravine, called the Khor Ghob, about 900 yards in front, which caused the Mounted Infantry screen to retire. It was at this time that General Graham gave the Black Watch the order to charge and there is doubt that a similar order was given at the same time to the York and Lancasters. The Record of Service of the Black Watch, states:
The order to charge which had only been given to the Officer Commanding Royal Highlanders was promptly obeyed the enemy at once disappeared from their front and when within a few paces of the ravine Lieut Col Green halted the Battalion wheeled the companies on the Left Flank into line and had the companies carefully dressed - there being no enemy to the front to prevent this. These arrangements had just been completed when it was observed that the enemy had commenced a determined attack on the right angle of the front face of the square.
The other battalions forming the square had not been given the order to charge and although The York and Lancaster Regiment hurried to keep up with the Black Watch there were gaps in the ranks when the square halted and the enemy were quick to exploit this. The tribesmen were able to break into the square and were now attacking the forward battalions from the rear. The battle became very confused and the forward companies of both battalions, being attacked on all sides, were compelled to retire, fighting in clusters, and contesting every inch of ground. The rear companies were able to show a better front and gradually the square was able to reform. The machine guns were left in the hands of the enemy, but their crews had been able to disable them before they withdrew or were overpowered and killed.
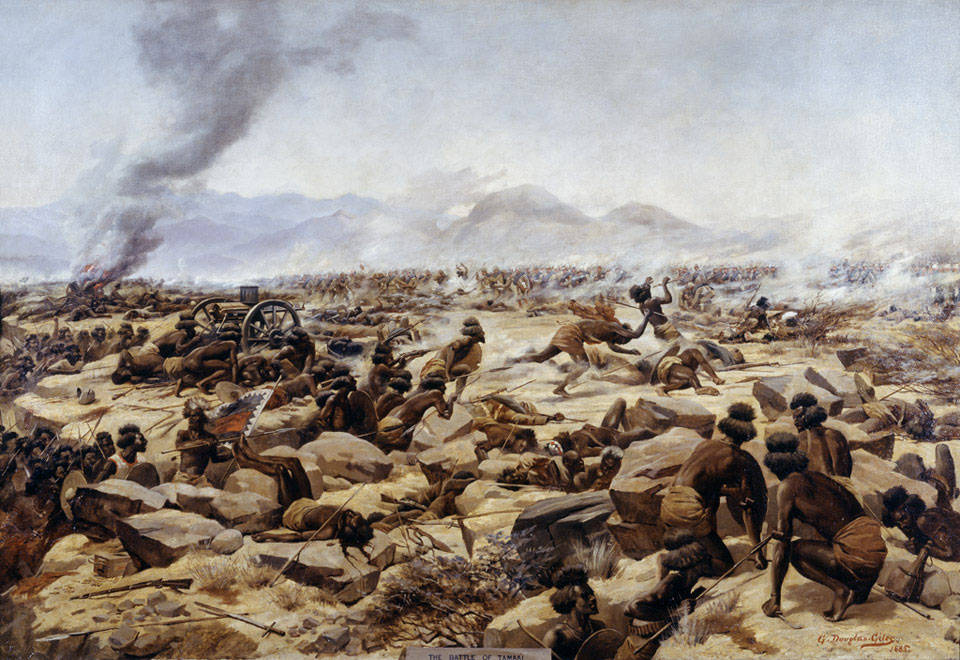
The Battle of Tamai by Godfrey Douglas Giles. Courtesy of the Council of the National Army Museum (1963-11-3).
The painting depicts the time when the broken 2nd Brigade square had reformed and was advancing to recover the abandoned guns of the Naval Brigade. The scene is viewed from the Mahdist position and shows the unsuccessful attempt by the Hadendowa tribesmen to get the guns into action. Godfrey Douglas Giles, as a serving officer, was present at the battle.
The 2nd Brigade reformed into its original formation and immediately advanced firing slowly and steadily and the guns were recaptured. In the meantime, the 1st Brigade had continued to advance to the right rear of the 2nd Brigade, fighting off attacks against itself and providing covering fire for the 2nd Brigade as it withdrew and reformed. Added support was provided by the cavalry which had galloped to a position where they were able to dismount and provide fire support to both brigades. Osman’s men continued their attack with great bravery, but the overwhelming fire from both brigades took an enormous toll on the attackers enabling the British squares to advance, clear the battlefield and burn the enemy camp. The fighting had taken some three hours, and, in this time, the British suffered just over 100 dead and a similar number of wounded. The Mahdists after losing an estimated 2,000 dead and many more wounded, withdrew from the battlefield in an orderly and controlled manner.
Although Graham favoured a continued advance to Berber to assist in the relief of Khartoum, he was ordered to return to Egypt and withdrew from Tamai back to Suakin the day after the battle. Leaving a small garrison behind to secure Suakin, Graham embarked his force on 3 April and sailed back to Egypt, allowing Osman Digna to regain his control over the area. The British dead were buried where they fell, and these graves can be seen clearly today. Although we did not have the time to map them in detail, it could be clearly seen where the fiercest fighting had taken place and where the square was broken. These brave men, mainly of the Black Watch and the York and Lancaster Regiment, remain to this day as sentinels on the site of this famous battle.
The first Suakin Expedition had not achieved a great deal strategically. Graham had not been able to assist Gordon’s position at Khartoum, had not rescued the bulk of the trapped Egyptian forces and had not delivered a knockout blow to Osman Digna, the Mahdist commander in the area, who soon recovered from his two reverses and reestablished his hold over the area. On the plus side, Suakin was now secure as a British base and hearty respect had been instilled in the Mahdists that British soldiers did not disintegrate and run in face of their fierce attacks, but stood and fought and attacked aggressively themselves.
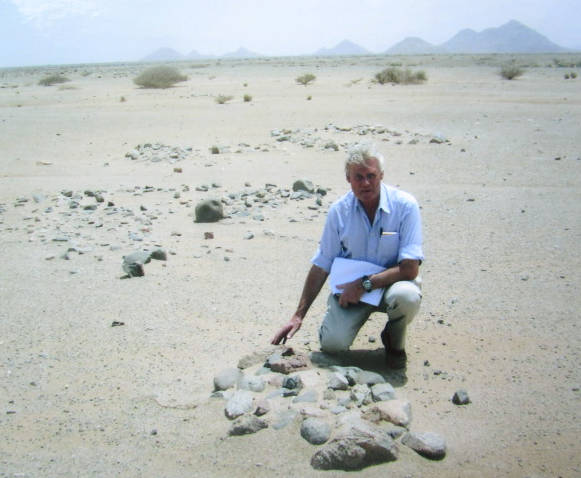
The Author at the Graves at Tamai.
The day was far from over and I was still anxious to find Tofrek, which had to be in the same area. I discussed this with our Hadendowa guide, through double translation, and if there was any feeling of disappointment that he had failed to show us what we had asked for originally, he did not show it, but after some reflection, he said “I think I know what you are talking about, my Grandfather once told me of this place” — but that is another story!
Related material
Last modified 23 August 2020