
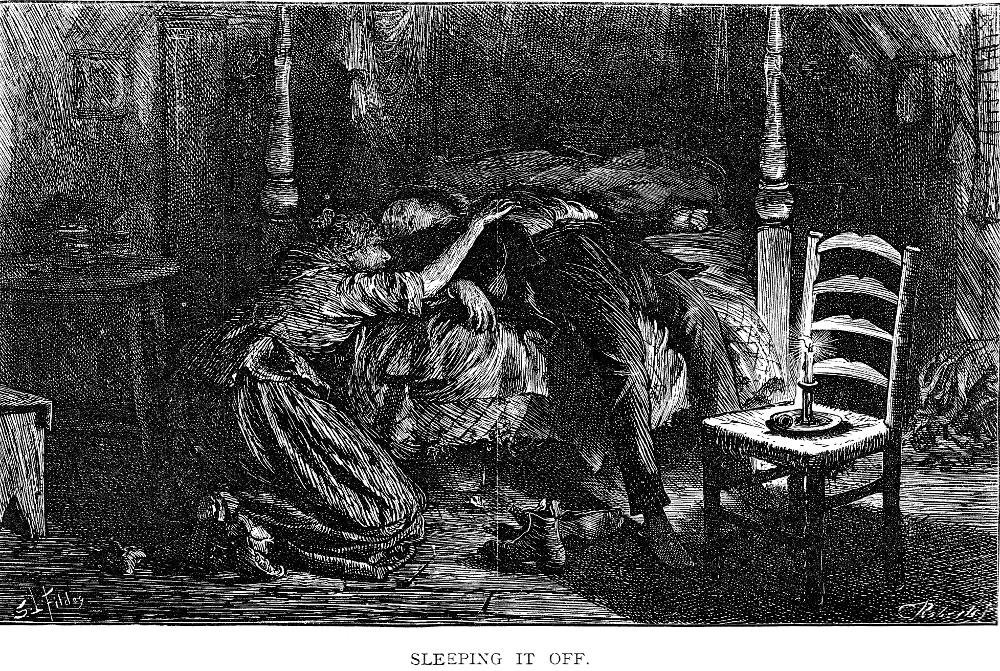
Sleeping It Off" by Sir Luke Fildes. Facing page 183 for the serial edition of The Mystery of Edwin Drood, September 1870. 16.6 cm wide by 10.2 cm high (6 ½ by 4 inches), framed and vertically mounted; in Chapter XXIII, "The Dawn Again" in serial, facing page 183; mounted horizontally on page 116 in the Household Edition (1879). [Click on the illustration to enlarge it.]
Commentary: We Come Full Circle to Jasper's Addiction
The caption explains that the figures are semi-conscious at best, subsiding into an opium-induced somnolent state. Given the general layout of the room and the appearance of the bed, we are in the same room described in the initial plate. However, here the artist has moved in closer, showing us the figures' faces more clearly. The accompanying passage indicates that neither character is entirely unconscious:
The woman kneels upon the floor, with her arms crossed on the coverlet of the bed, close by him, and her chin upon them. In this crouching attitude she watches him. The pipe is falling from his mouth. [115 in the Household Edition; 183 in serial]
The setting is "a miserable court" (179 in serial) in the East End of London, far removed spatially and even more so socially from the scenes of the lower Thames and Cloisterham that have dominated the series; however, the final illustration takes us back to where we began, in the sordid opium den of In the Court (April number). The figures, as we know from the earlier part of Chapter XXIII, are John Jasper and his narcotics supplier, Princess Puffer, herself deeply addicted.
J. Cuming Walters, writing in 1912, asserted that the opium den was drawn from a real scene of vice and depravity in the depths of London's notorious East End — the opium dens that were the late nineteenth-century British equivalent of the late twentieth-century American crack-house:
It has been assumed to be in the Shadwell neighbourhood of the London Docks, as Jasper, starting from Falcon Square, went "eastward and still eastward, through the stale streets," until he reached the "miserable court, especially miserable among the many such." Forster tells us that Dickens saw with equal vividness the lazy cathedral town and the lurid opium-eater's den; and subjoins a footnote from an American correspondent--"I went lately with the same inspector [Field] who accompanied Dickens to see the room of the opium-smokers, Old Eliza and her Lascar or Begalee friend. There a fancy seized me to buy the bedstead which figures so accurately in Edwin Drood, in narrative and picture. I gave the old woman and pound for it." [Walters, xxxiii]
Appropriately enough, Dickens's untimely death resulted in the illustrations coming full circle, so that the novel visually breaks off where it began, with the sordid opium den of Princess Puffer and her respectable customer with the hidden life, choirmaster John Jasper.
Scanned image, colour correction, sizing, caption, and commentary by Philip V. Allingham. [You may use this image without prior permission for any scholarly or educational purpose, as long as you (1) credit the person who scanned the image, and (2) link your document to this URL in a web document or cite the Victorian Web in a print one.]
Bibliography
Cohen, Jane R. "Chapter 18: Luke Fildes." Charles Dickens and His Original Illustrators. Columbus: Ohio State U. P., 1980. Pp. 221-234.

Dickens, Charles. The Mystery of Edwin Drood. With Illustrations by Samuel Luke Fildes, R. A. London: Chapman and Hall, 1870.
_______. The Mystery of Edwin Drood; Reprinted Pieces and Other Stories. With Thirty Illustrations by L. Fildes, E. G. Dalziel, and F. Barnard. The Household Edition. 22 vols. London: Chapman and Hall, 1879. Vol. XX.
Kitton, Frederic G. Dickens and His Illustrators: Cruikshank, Seymour, Buss, "Phiz," Cattermole, Leech, Doyle, Stanfield, Maclise, Tenniel, Frank Stone, Landseer, Palmer, Topham, Marcus Stone, and Luke Fildes. Amsterdam: S. Emmering, 1972. Re-print of the London 1899 edition.
Walters, J. Cuming. The Complete Mystery of Edwin Drood by Charles Dickens: The History, Continuations, and Solutions (1870-1912). Illustrated by Luke Fildes and Frederic G. Kitton. London: Chapman and Hall, 1912.
Created 28 June 2005 last updated 17 June 2023