
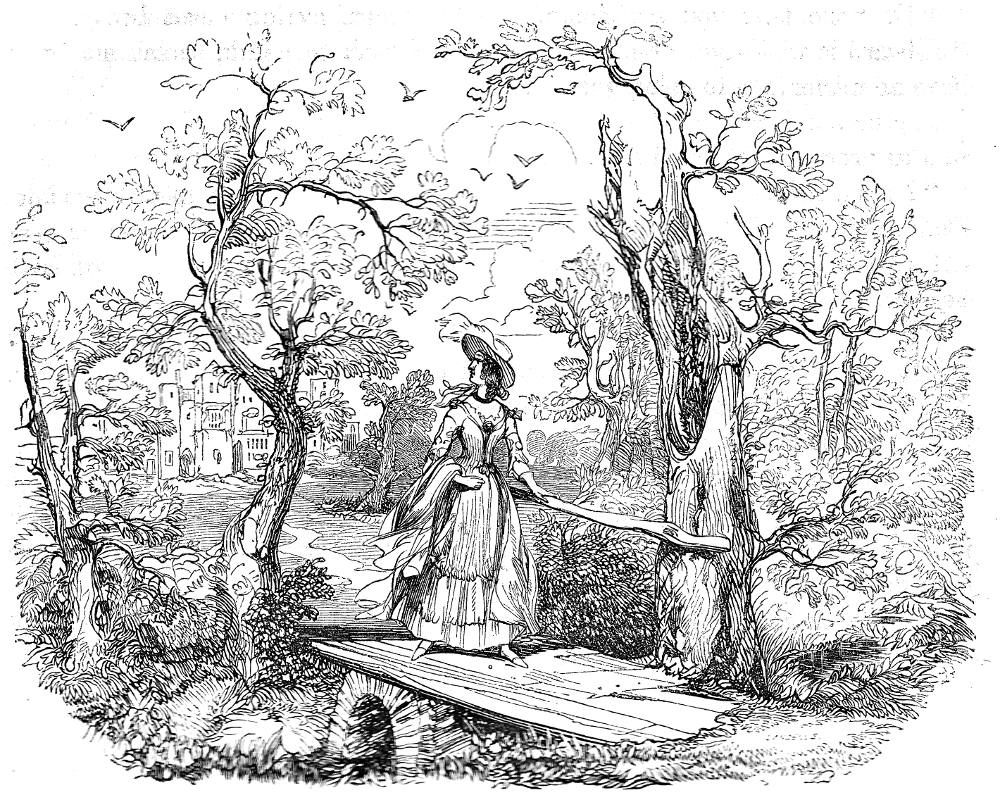
Miss Haredale on the Bridge by George Cattermole. 3 ¾ x 4 ½ inches (9.5 cm by 11.5 cm). Vignetted, wood-engraved. Chapter XXIX, Barnaby Rudge. 29 May 1841 in serial publication (twenty-ninth plate in the series). Part 16 in the novel, serialised in Master Humphrey's Clock, Vol. III (part 59), 101. [Click on the images to enlarge them.]
Passage Illustrated: Mr. Chester meets Emma in the Woods near The Warren
. . . he entered the bounds of Miss Haredale’s usual walk. He had not gone far, or looked about him long, when he descried coming towards him, a female figure. A glimpse of the form and dress as she crossed a little wooden bridge which lay between them, satisfied him that he had found her whom he desired to see. He threw himself in her way, and a very few paces brought them close together.
He raised his hat from his head, and yielding the path, suffered her to pass him. Then, as if the idea had but that moment occurred to him, he turned hastily back and said in an agitated voice:
"I beg pardon — do I address Miss Haredale?"
She stopped in some confusion at being so unexpectedly accosted by a stranger; and answered "Yes." [Chapter the Twenty-ninth, Vol. III, 101]
Commentary: Mr. Chester's meeting with Miss Haredale — not by Chance
This, like Hugh's with Dolly in more or less the same spot, is no chance meeting. As Hugh had been (as it later turns out) directed by Mr. Chester to intercept any correspondence between Emma Haredale and Edward Chester, so the meeting is the result of Mr. Chester's design to terminate the relationship between his own son and his enemy's niece. What is curious about the illustration (other than the appearance of The Warren in the background, when Phiz omitted the mansion entirely from his illustration of the other meeting there) is the total absence of Mr. Chester. However, he is consistently presented as a caricature, and his presence in an otherwise picturesque plate would have been both intrusive and jarring as Emma is presented as a realistically drawn aristocratic young woman, not a caricature like Miss Miggs, for instance. The elder Chester's absence from the illustration compels the reader to focus on his presence as a distinctive voice rather than a version of Phiz's aging roue.
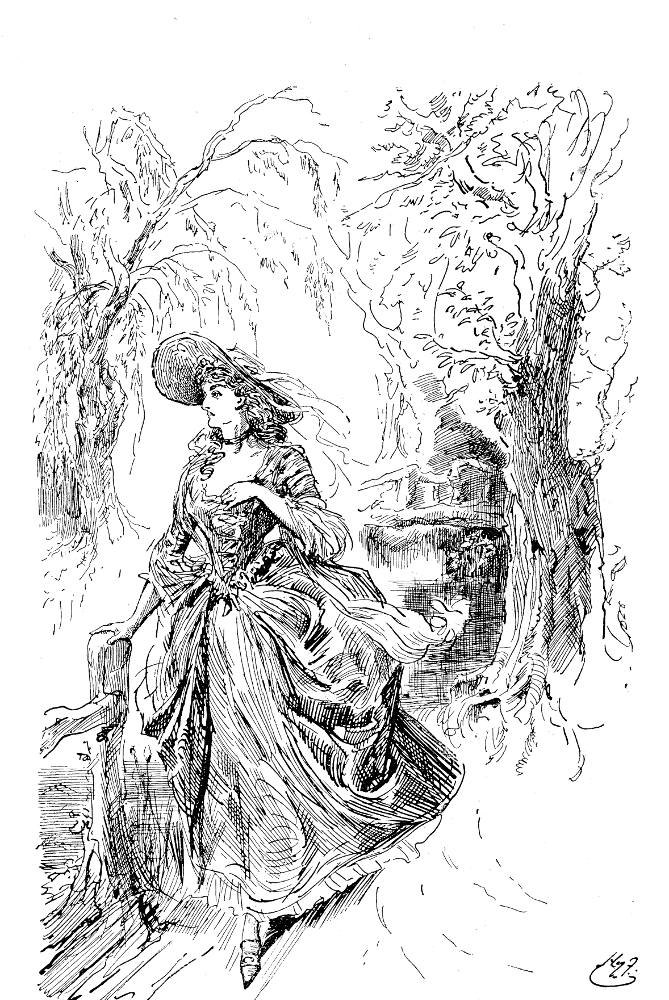
Equivalent Scenes from other Editions, 1874 and 1910

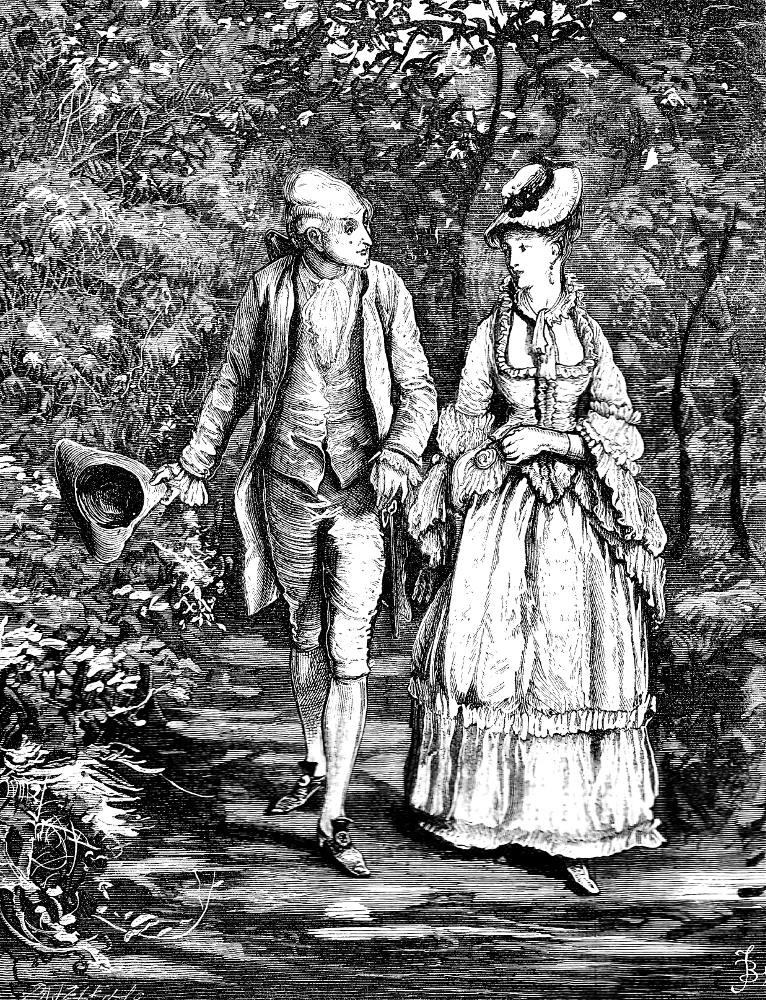
Left: Phiz's complementary scene of Hugh's intimidating Dolly Varden in the
woods near the Warren:

Related Material including Other Illustrated Editions of Barnaby Rudge
- Dickens's Barnaby Rudge (homepage)
- George Cattermole, 1800-1868; A Brief Biography
- Phiz's Original Serial Illustrations (1841)
- Cattermole and Phiz: The First Illustrators — A Team Effort by "The Clock Works" (1841)
- Felix Octavius Carr Darley's six illustrations (1865 and 1888)
- Sol Eytinge, Jr.'s Diamond Edition illustrations (1867)
- Fred Barnard's 46 illustrations for the Household Edition (1874)
- A. H. Buckland's 6 illustrations for the Collins' Clear-type Pocket Edition (1900)
- Harry Furniss's 28 illustrations for The Charles Dickens Library Edition (1910)
Scanned image, colour correction, sizing, caption, and commentary by Philip V. Allingham. [You may use this image without prior permission for any scholarly or educational purpose, as long as you (1) credit the person who scanned the image, and (2) link your document to this URL in a web document or cite the Victorian Web in a print one.]
Bibliography
Dickens, Charles. Barnaby Rudge. Illustrated by Hablot K. Browne ('Phiz') and George Cattermole. London: Chapman and Hall, 1841; rpt., Bradbury & Evans, 1849.
________. Barnaby Rudge — A Tale of the Riots of 'Eighty. Illustrated by Fred Barnard. The Household Edition. 22 vols. London: Chapman and Hall, 1874. VII.
________. Barnaby Rudge. Illustrated by Harry Furniss. The Charles Dickens Library Edition. London: Educational Book Company, 1910. VI.
Hammerton, J. A. "Ch. XIV. Barnaby Rudge." The Dickens Picture-Book. The Charles Dickens Library Edition, illustrated by Harry Furniss. London: Educational Book Co., 1910. 213-55.
Vann, J. Don. "Barnaby Rudge in Master Humphrey's Clock, 13 February 1841-27 November 1841." Victorian Novels in Serial. New York: MLA, 1985. 65-6.
Created 4 January 2006
Last modified 5 December 2020